This post originally appeared on PlanGrid’s Construction Productivity Blog
The Last Planner® System (LPS) is a realistic way to collaboratively manage project-based production. It enables issues to be identified and resolved and increases the chances that workflows and projects are completed on time. Simply put, LPS is exactly what its namesake suggests, a system that engages last planners—the people ultimately responsible for getting the work done—in the planning and efficient execution of a project.
Developed by Glenn Ballard and Greg Howell, LPS was designed to produce a predictable workflow with rapid learnings for continuous improvement. A common misconception is that teams need to subscribe to all parts of Lean construction and its principles before using the Last Planner® System. While Lean and other theories like Agile Construction Management are useful to understand the origin of LPS, the only requirement to get started is a team’s commitment to working together and becoming more efficient by adhering to the Last Planner® System.
LPS is useful at any stage, from design through construction, and everyone from owners and project executives to trade partners and superintendents can use and benefit from using LPS. The outcome of enacting the Last Planner® System is a continuously improving project workflow with increased team accountability and commitment.
If you’re looking to get started using LPS, we break down the five stages of the system below and provide tips on how you can implement it today. Please note that all projects are unique and therefore, each of the following steps and recommendations should be customized to the project scope and team.
Breaking Down the Last Planner® System
LPS is made up of five components:
- Master Scheduling
- Phase Scheduling
- Look-Ahead Planning
- Commitment Planning
- Learning
1. Master Scheduling
What it is: The process of building a schedule covering an entire project start-to-finish. It involves identifying and planning for high-level milestones that end up defining phases of work and their relative overlaps.
When to use it: Master scheduling should start as soon as is practical, with the master schedule being further refined as project details come into more focus. It is not essential to have the entire master schedule complete to the same level of detail from the start. What matters is that the full project is captured and that the earlier phases are better defined.
Why do it: The master schedule is the basis for all other planning during the project. It sets the milestones and phase durations for the project. All future detailed activities will be built out in the following steps.
Who is involved: During the conceptual and design stage, typically the construction manager/owner’s representative and the architect are involved. Once the general contractor is aboard, they take the baton.
How to get started: Teams should get together and identify the project’s milestones first—this is what all other work will be based off of in the master schedule.
2. Phase Scheduling
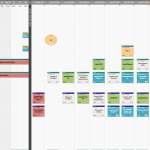
What it is: The collaborative planning process of defining and sequencing tasks to complete phases of work established in the master schedule. It is often done using a technique known as “pull planning” where teams work backward from a clearly defined milestone, identifying in detail the tasks required to complete the milestone as well as the conditions of satisfaction for the handoffs between the tasks.
When to use it: Typically six to twelve weeks ahead, depending on the lead times required to remove constraints.
Why do it: Phase scheduling often produces better plans because the people involved in actually doing the work are the ones planning it. Phase scheduling also develops a strong sense of ownership for the plan across the entire project team, which leads to improved reliability and accountability.
Who is involved: The last planners. During design, it’s the design team leads or the actual designers. During construction, it’s the general contractor project team and trade contractor foremen. Lean leaders often join to support and discuss as well.
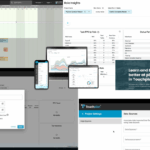
How to get started: Project teams should have an in-person planning meeting to sequence out the phase work. (Each participant should detail out their own work beforehand.) A facilitator, often the lead architect (for design) or the project superintendent (for construction) should lead the planning conversations while team members sequence out their work together. Software like Touchplan offers a virtual planning environment that makes real-time collaborative phase scheduling a breeze.
3. Look-Ahead Planning
What it is: A way to identify and clear constraints preventing upcoming work from being completed as planned before these constraints become a problem.
When to use it: During weekly meetings. Ideally, the team is reviewing work planned four to six weeks out to remove any potential obstacles.
Why do it: To ensure work is ready to start when planned.
Who is involved: The last planners.
How to get started: Have everyone consider their upcoming work and spend time identifying constraints that could hold them up if not addressed. Record these constraints and assign specific people to run each to ground. Follow up weekly to make sure progress is being made. For instance, Touchplan has a tailor-made constraints module that simplifies the process of identifying and tracking constraints.
4. Commitment Planning (or Weekly Work Planning)
What it is: A way for teams to regularly meet, talk about current and future work and collectively commit to getting next week’s work done.
When to use it: The best practice is to have teams meet once a week to discuss their work and make commitments, then to meet briefly in daily huddles to ensure everyone is tracking to the plan.
Why do it: Team members refine their plan for the upcoming week one last time before committing to getting their specific tasks done on specific days, with the goal of ensuring that team members who follow can count on being able to start their work on time.
Who is involved: The last planners.
How to get started: Schedule a mandatory weekly time for project teams to connect in person and be prepared to commit to what they intend to accomplish over the coming week. Solutions like Touchplan enables team members to instantly transform their phase scheduling tasks into detailed weekly tasks, make further refinements as necessary, and then capture and track everyone’s commitments automatically, greatly reducing time spent in these weekly meetings.
5. Learning
What it is: To constantly improve, teams must regularly take inventory of what went well (plusses) and what didn’t (deltas) with the previous week’s plan.
When to use it: Immediately following completion of the prior week’s plan.
Why do it: This crucial step is how teams identify root causes of plan failures and figure out how to prevent them or plan around them for the remainder of the project. The idea is to take lessons learned and immediately adjust the rest of the plan to accommodate the lesson learned.
Who is involved: The last planners.
How to get started: With Touchplan, for instance, the Percent Plan Complete (PPC) is automatically calculated based on the proper execution of the previous steps. Evaluating the PPC and reviewing the associated variance reasons give context to what happened. Teams should then work through a process known as “5 Whys” to get to the root cause of any identified problem, and then, once the root cause is known, develop countermeasures to prevent reoccurrence.
Stay tuned for part II of this post next week, or read more at PlanGrid’s Construction Productivity Blog.


